Appearance
Share libraries
In WeWeb, you can work with shared libraries.
These libraries can come from other projects in your workspace, or from the WeWeb marketplace:

Common use cases for working with shared libraries include but are not limited to:
- Leveraging popular libraries to build faster
- Working with a single UI kit across multiple projects for a company that requires you to follow strict brand guidelines
Share a library
To share a library with the rest of your workspace:
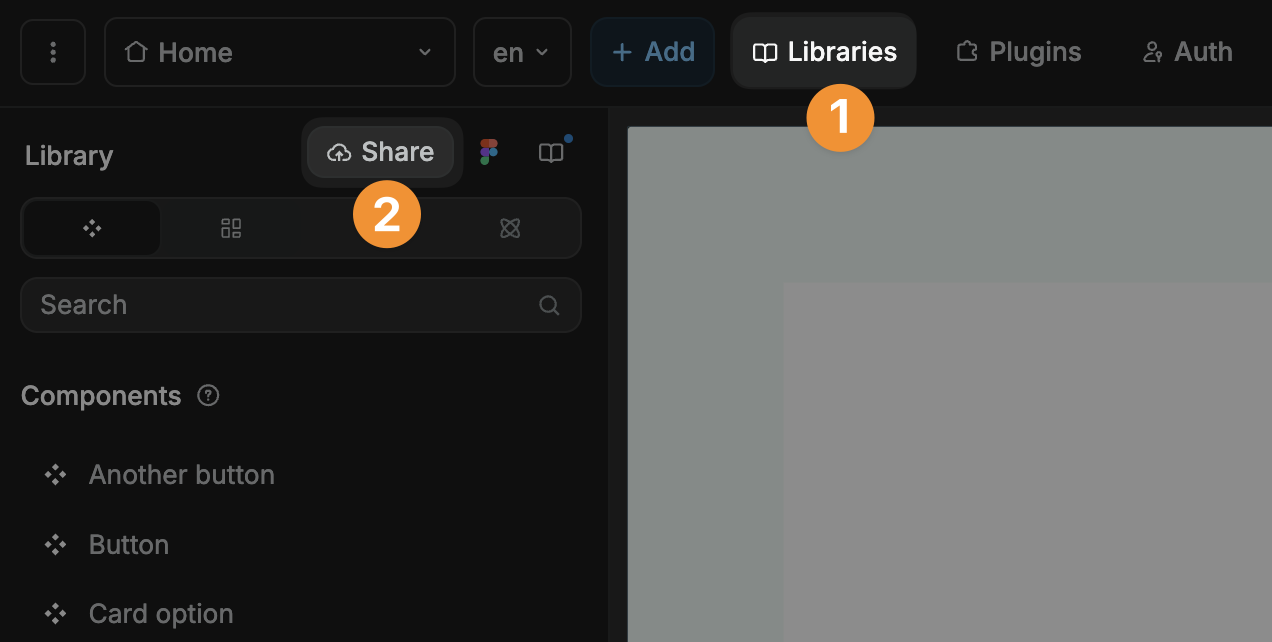
- Open the project where you built the library you want to share
- Click on the
Assetstab in theInterfacesection - Select
Library - Click on the
Sharebutton in the top right - Name your commit and add a description
- Click
Shareto make the library available to your workspace
Add a shared library
To view and add shared libraries:
- Click on the
Assetstab in theInterfacesection - Select
Library - Click on the book icon to view
AvailableandMarketplacelibraries
The Available tab lists:
- All the libraries that have already been added to the current project, including marketplace libraries
- All the libraries that have been shared in your workspace but haven't yet been added to the current project
The Marketplace tab lists all the libraries from the WeWeb marketplace that can be added to the current project.
To start using one of these libraries in your project, simply click on Add:
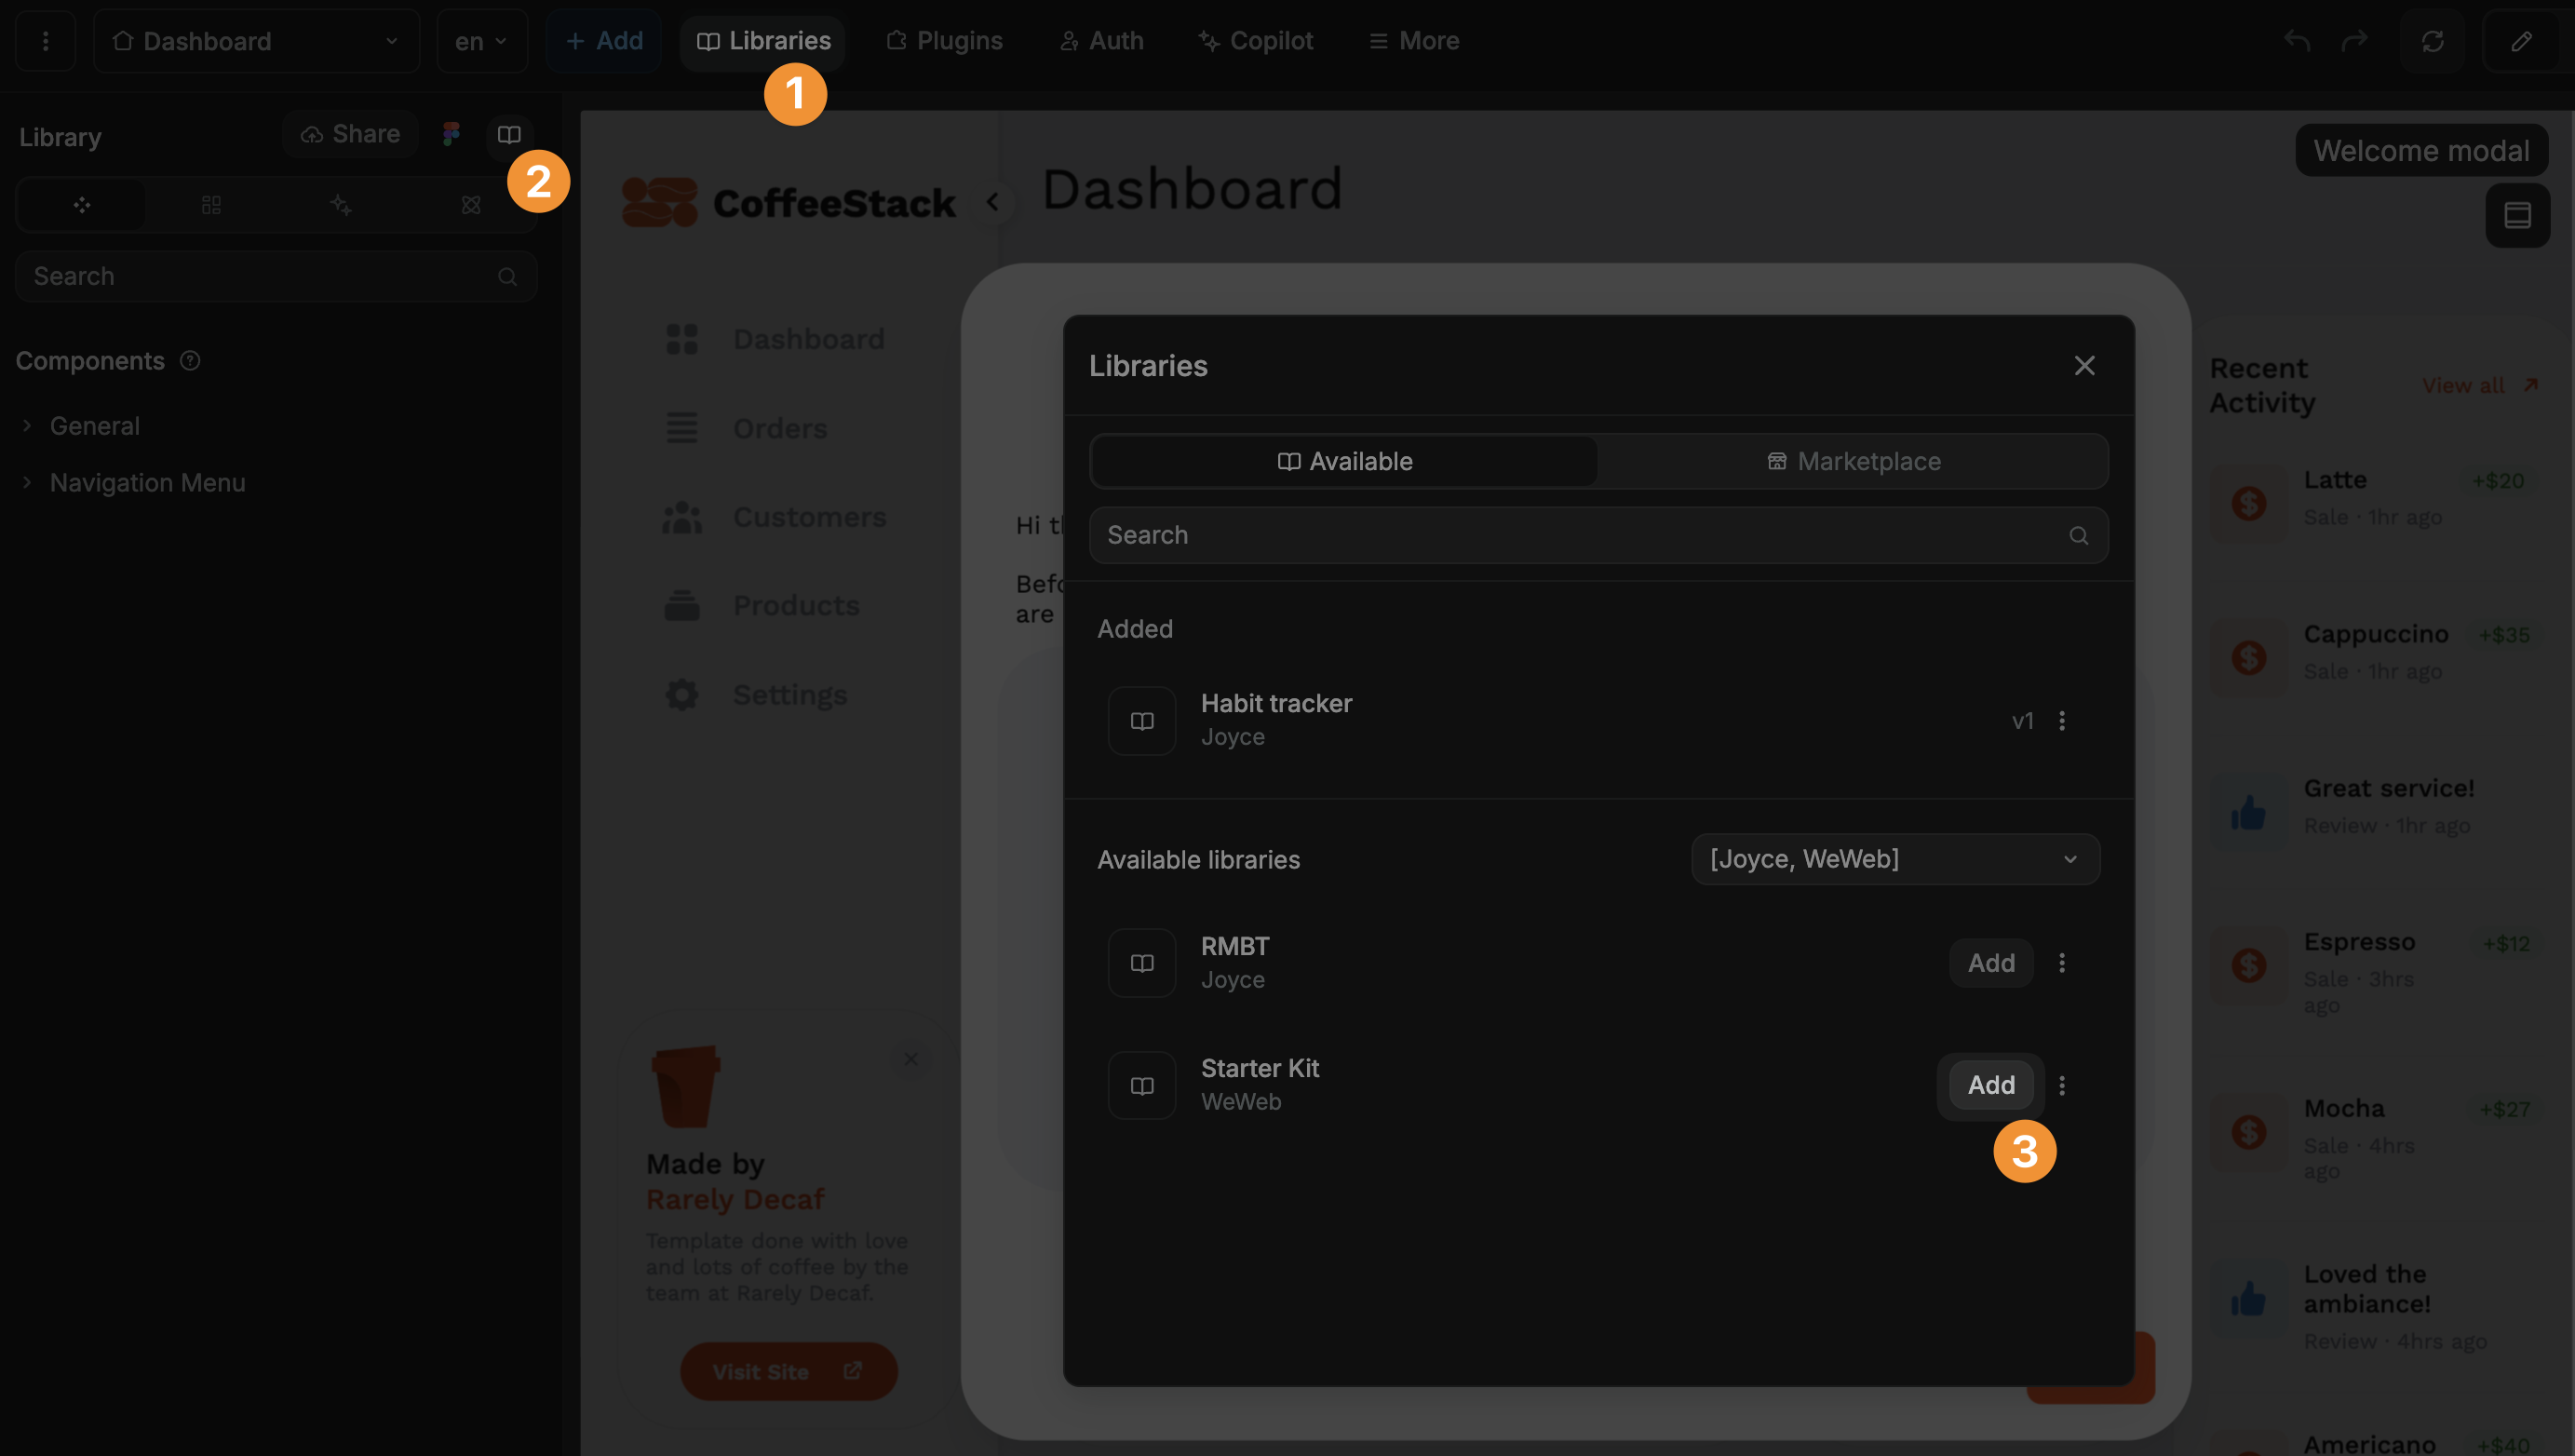
This will move the library up to the Added section of the panel in the Available tab, like the "Habit tracker" library in the example above.
WARNING
Can't find the library you're looking for?
Open the project with the source library you're looking for, go to the Assets tab → Library, and click on Share as described in the "Share a library" section above.
Remove a library
To remove an external library that you added to a project:
- Click on the
Assetstab in theInterfacesection - Select
Library - Click on the book icon to open the shared libraries panel
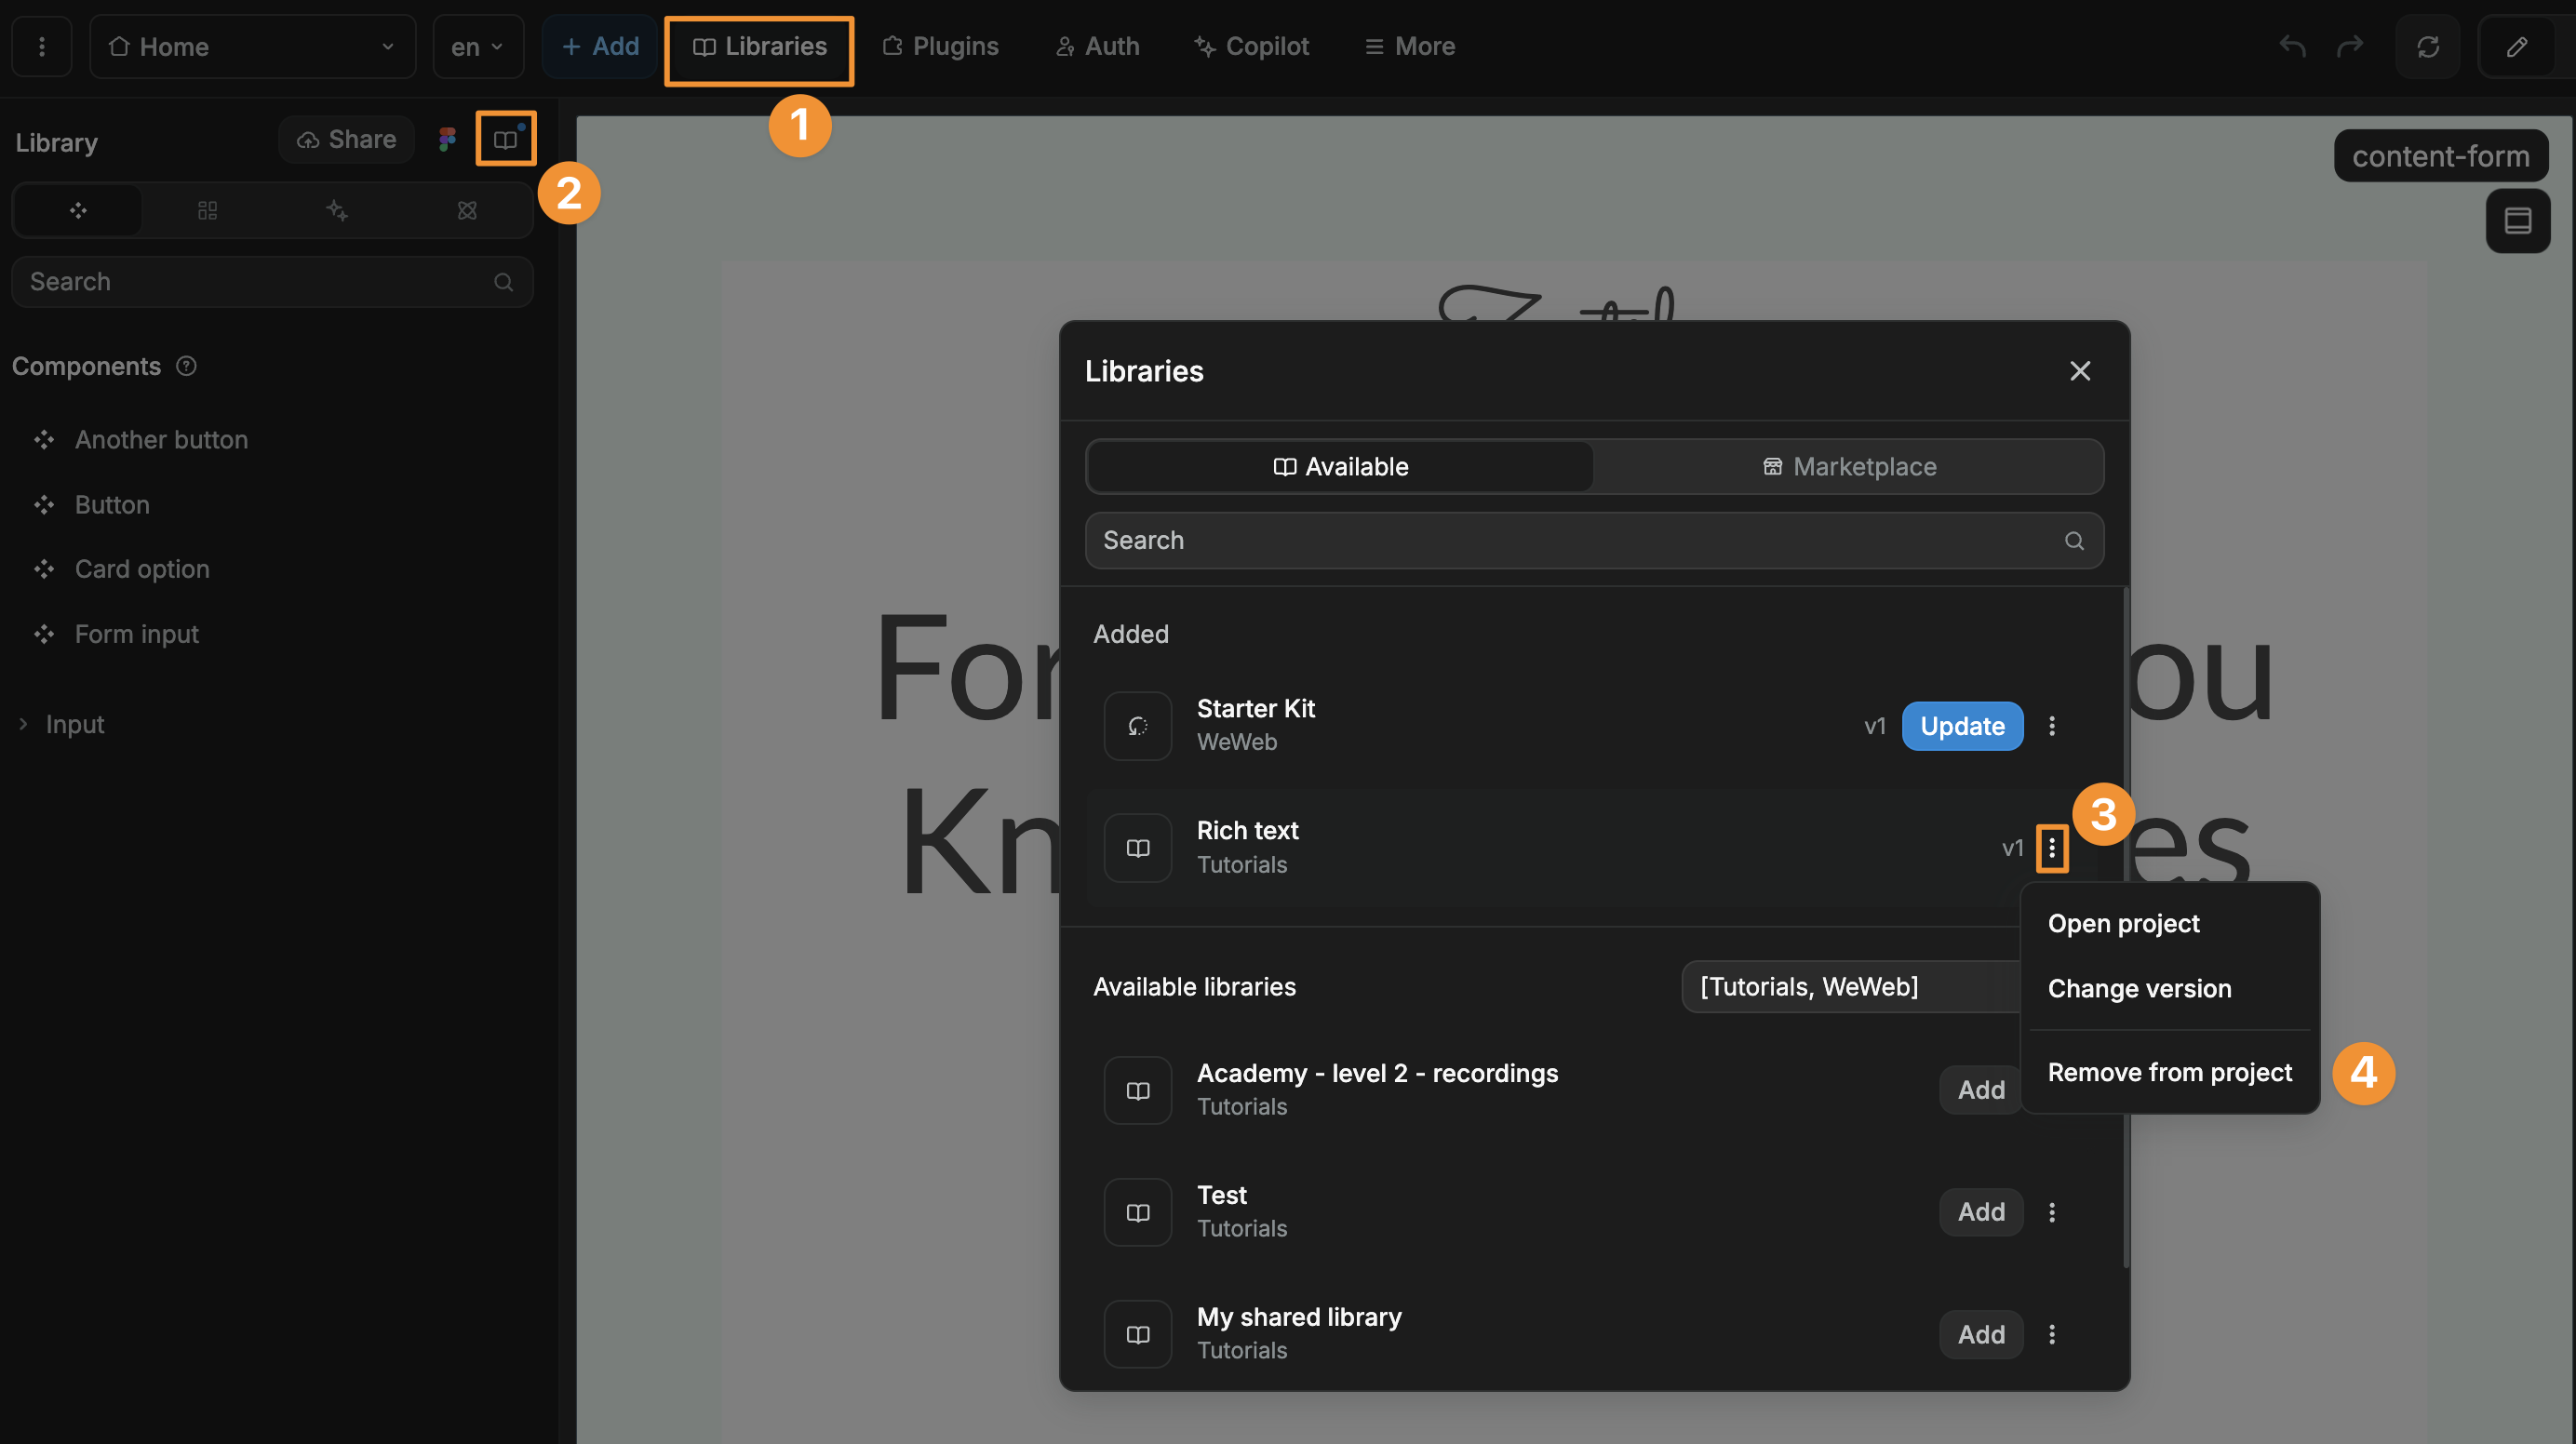
- In the
Addedsection, select the library you want to remove - Click on the three dots (•••) menu
- Click on
Remove from project
Update a shared library
Whether you are sharing a library with others or working with an external library others shared with you, you will want to make changes and updates at some point.
There are three steps to updating a shared library:
- Make the changes in the library
- Publish those changes so they are available to other projects in the workspace
- Update the library in the projects that use it
1. Make changes to a shared library
To make changes to a shared library, simply go to that project and make all the changes you want.
For example, you could edit a typography, add or delete spacings, templates, or components.
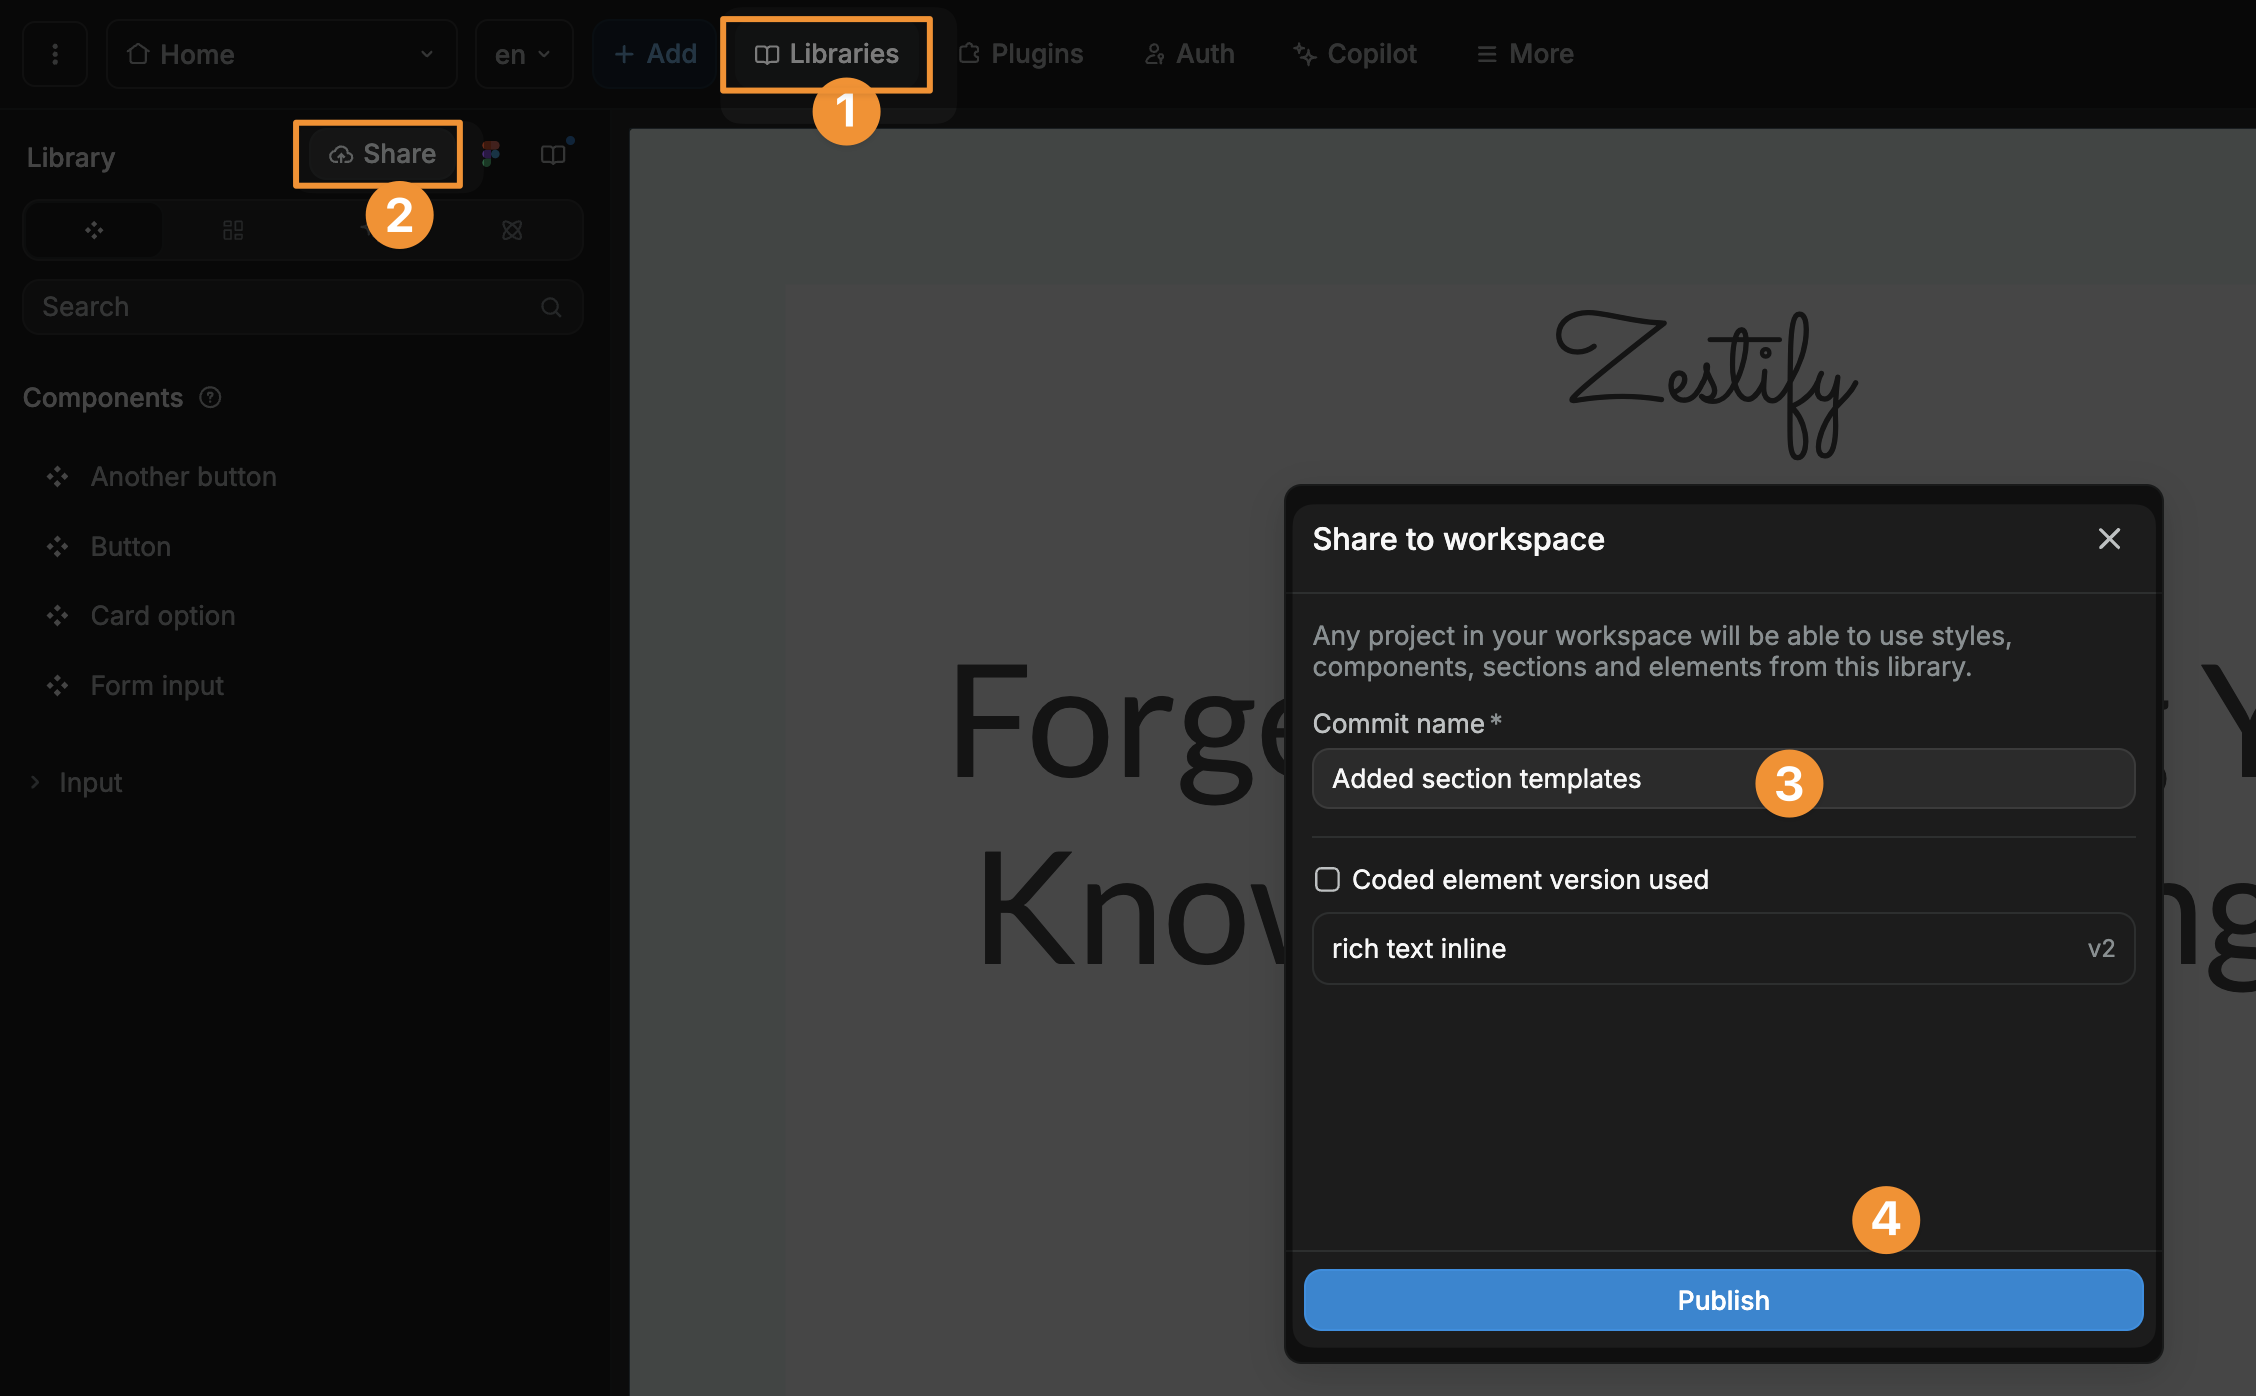
2. Publish changes of a shared library
Once you are ready to commit those changes to make them available to other projects in the workspace:
- Click on the
Assetstab in theInterfacesection - Select
Library - Click on
Share - Fill out the commit message
- Click
Shareto publish your changes
TIP
Try to be descriptive when adding a commit message to library updates.
This will help users of your library understand what's new and how a library update might affect their projects.
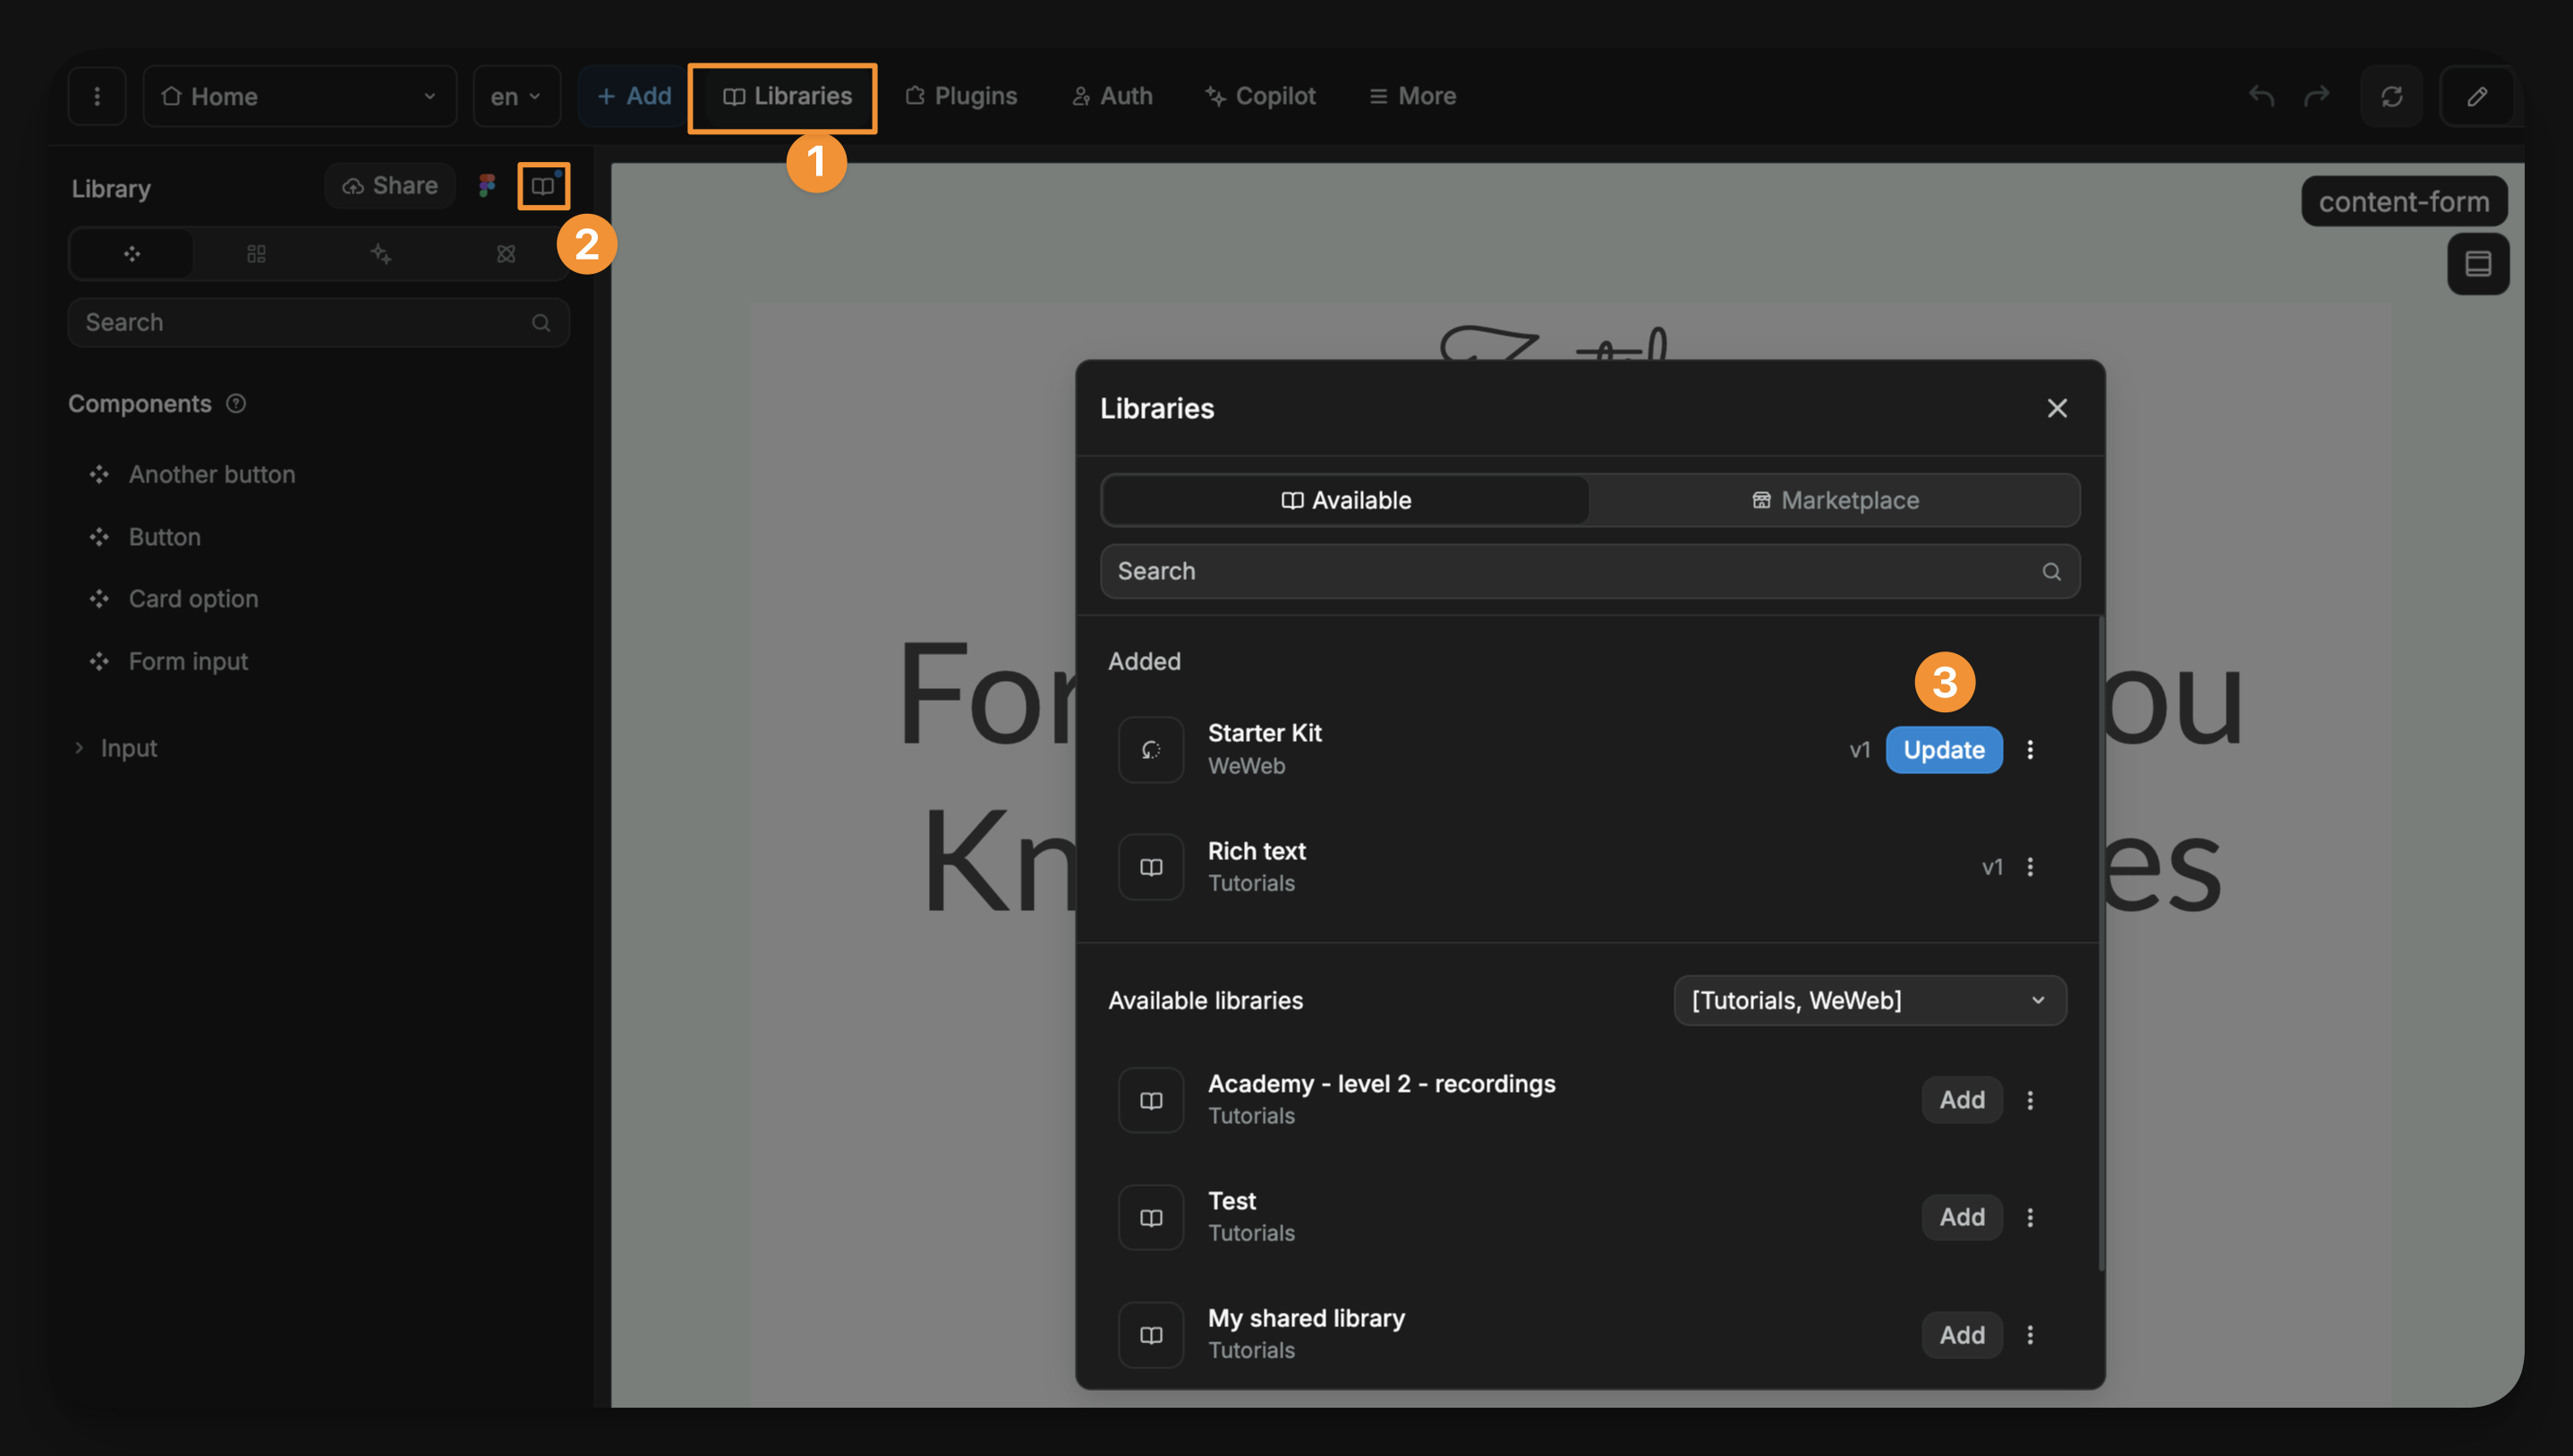
3. Update the library in the projects that use it
Once the changes to a library have been shared to the workspace, you will see a notification in the projects that use it.
When you're ready to update:
- Click on the
Assetstab in theInterfacesection - Select
Library - Click on the book icon to open the shared libraries panel
- Find the library with updates available
- Click
Updateto apply the latest changes
Use library versions
At times, you may want to rollback or rollforward to different versions of a shared library.
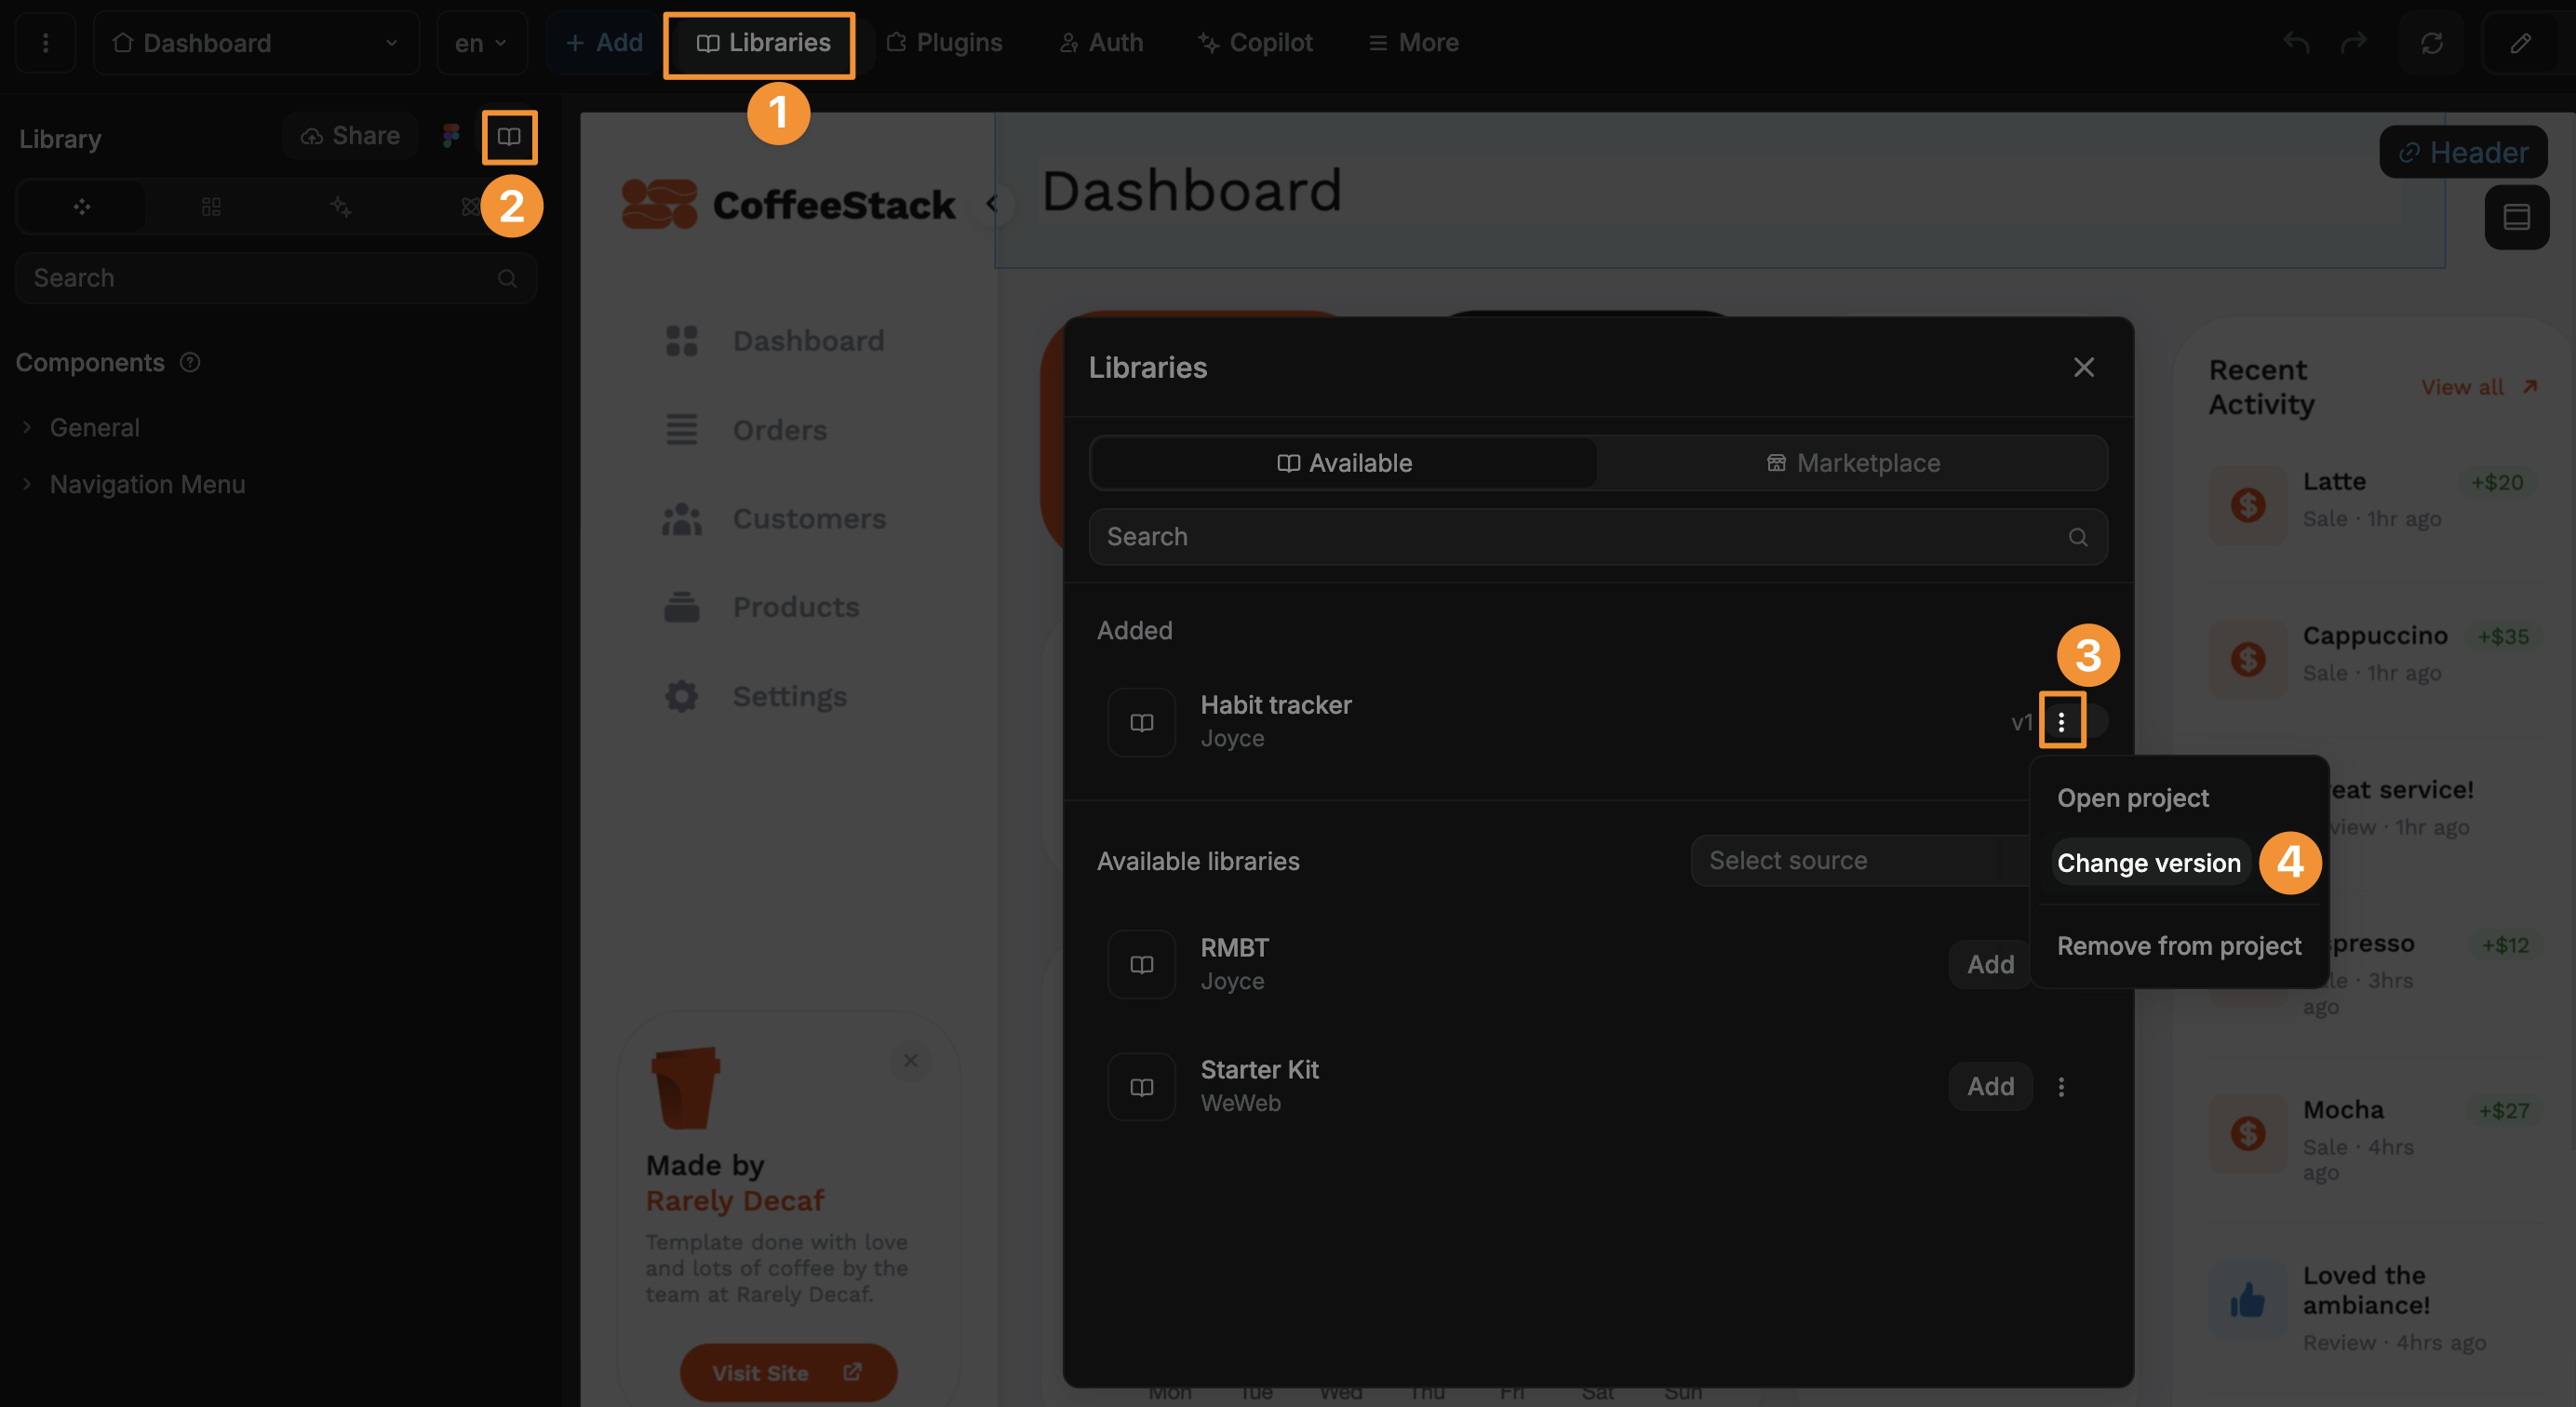
To change library versions:
- Click on the
Assetstab in theInterfacesection - Select
Library - Click on the book icon to open the shared libraries panel
- Find the library you want to change versions for
- Click on the three dots (•••) menu
- Select
Change version - Choose the version you want to use